If you’ve ever had gel or acrylic nails, you know the struggle: they look stunning, but when it’s time to remove them, things get tricky. Salon visits can be time-consuming and costly. The good news? With the right tools, patience and gentle techniques, you can remove gel or acrylic nails at home without damaging your natural nails.
In this step-by-step guide, you’ll learn safe methods for both gel polish and acrylics, common mistakes to avoid and the best aftercare to keep your nails strong and healthy.
Why It’s Important to Remove Nails the Right Way
Peeling or forcing off gel and acrylics might feel tempting, but it can strip away layers of your natural nail, leaving them thin, brittle, and painful. Using proper removal techniques ensures your nails stay healthy and ready for your next manicure.
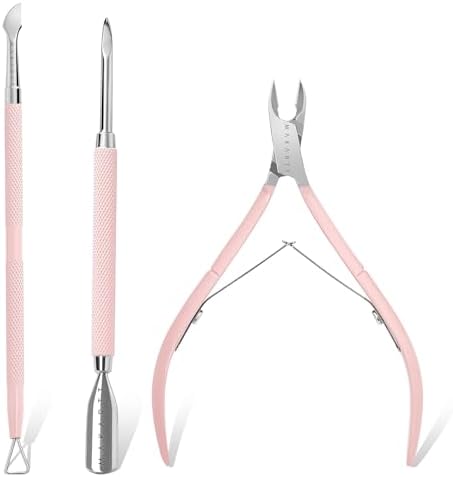
What You’ll Need
Before you start, gather these essentials:
- Nail file (coarse and fine grit)
- Pure acetone (not regular nail polish remover)
- Cotton balls or pads
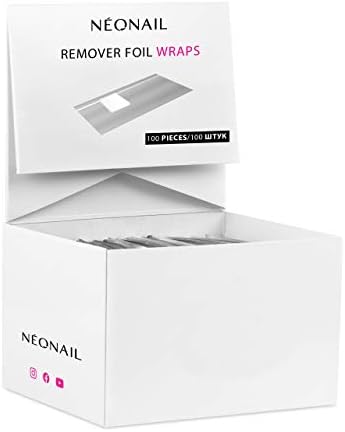
- Aluminum foil (cut into small squares)
- Cuticle pusher or orangewood stick
- Nail buffer
- Cuticle oil or nourishing nail serum
- Hand cream

Disclaimer: Acetone is generally considered safe for at-home nail removal when used properly, but it can cause dryness or irritation. Always work in a well-ventilated space, avoid prolonged skin contact and follow up with hydration. If you have allergies, sensitive skin, or a medical condition, consult a professional before use.
How to Remove Gel Nails at Home
Step 1: File the Top Coat
Gently file the shiny top layer of your gel polish. This helps the acetone soak through the polish faster. Be careful not to over-file into your natural nail.
Step 2: Soak Cotton and Wrap
Soak cotton balls in acetone and place them on each nail. Wrap with foil to hold them in place. Wait about 15–20 minutes.
Step 3: Gently Push Off Gel
After soaking, use a cuticle pusher to softly push the loosened gel off your nails. If it resists, re-wrap and soak for another 5 minutes instead of scraping.
Step 4: Buff and Hydrate
Lightly buff your nails to smooth the surface. Follow up with cuticle oil and a rich hand cream.

How to Remove Acrylic Nails at Home
Step 1: Trim and File Down
Clip your acrylic nails short. Then, use a coarse file to thin down the acrylic surface.
Step 2: Soak in Acetone
Fill a small bowl with acetone and soak your nails for 30–40 minutes. Alternatively, you can use the foil method with acetone-soaked cotton balls.
Step 3: Gently Lift Acrylic
Once the acrylic softens, carefully lift it with a cuticle pusher. Don’t force it (soak longer if needed).
Step 4: Buff and Restore
After removal, buff your natural nails and apply cuticle oil. Acrylic removal can be drying, so hydration is key.
If your nails feel weak after removal, check out my guide on how to heal brittle nails after acrylics for extra recovery tips.

Common Mistakes to Avoid
- Don’t peel or rip off polish or acrylics: this peels layers of your natural nail.
- Avoid metal tools with force: they can cause deep nail damage.
- Don’t skip aftercare: nails need moisture to recover.
- Many people make small mistakes that slowly damage their nails. Learn the biggest nail care mistakes to avoid so your nails stay healthy after removal.

Nail Aftercare: Strengthen and Protect
Your nails will likely feel a little weaker after gel or acrylic removal. Here’s how to restore them:
- Apply cuticle oil daily
- Use a strengthening base coat if painting nails again
- Keep nails trimmed short until they regain strength
- Moisturize hands regularly
- Once your nails are restored, choose a gentle polish to keep them strong. I recommend these non-toxic nail polish brands if you have sensitive skin or nails
Final Thoughts
Learning how to safely remove gel and acrylic nails at home is a game-changer. Not only does it save time and money, but it also keeps your natural nails healthier in the long run. By following these gentle steps, you can enjoy salon-worthy nails.
Next time your manicure grows out, skip the urge to peel and follow this safe removal routine instead. Your nails will thank you.
Ready to style your fresh, natural nails? Try these cute nail art ideas for short nails that are easy and trendy.

FAQs: Removing Gel and Acrylic Nails at Home
No. Regular nail polish remover usually isn’t strong enough to break down gel polish. You’ll need pure acetone for effective removal.
Typically, it takes 30–40 minutes of soaking in acetone to loosen acrylics enough to remove safely. Patience is key. Forcing them off can damage your natural nails.
The foil method (cotton soaked in acetone, wrapped in foil) is the quickest and most effective. Avoid peeling or scraping, as this weakens your nails.
Yes, but it’s less effective. Filing down gel polish can work, but it risks thinning your natural nails. Acetone remains the safest and most reliable option.
Use a nail strengthener, apply cuticle oil daily, keep nails short and moisturize your hands often. This helps them regain strength and prevents breakage.
No. Once removed, gel polish and acrylics can’t be reapplied. It’s better to start fresh with a new set.
Disclosure: This post contains Amazon affiliate links. That means if you click and make a purchase, I may earn a small commission at no extra cost to you. I only recommend products I truly love or would use myself. Thank you for supporting this blog and helping me keep the content free and helpful! 💛